Cracking the croissant code
Took a class, learned to make viennesoires
Yesterday, I had an anti-celebration of the United States of America’s Independence Day. On the 4th of July, I took a croissant baking class in Paris. The class was a Christmas gift from Mandeep. Given this exceptional year so far, I hadn’t been able to schedule it until now. But with a couple of well-placed reminders, I finally scheduled it.
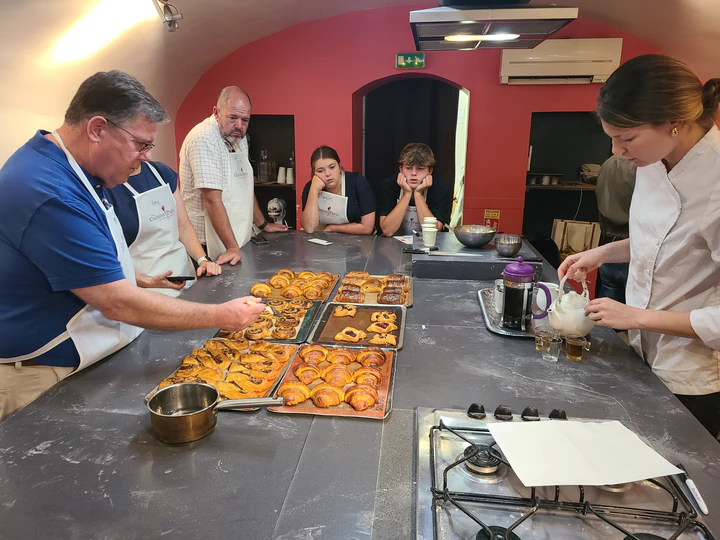
First, we should make no mistake. Clearly, an activity marked for tourists is expected to run entirely in English. The eight of us assembled for our slot. We went down into a small test kitchen and gathered around a large stone-top island where we would learn the art of making croissants and other viennoiseries. Despite being touristic in nature and everybody in attendance, including technically myself, being from the United States, it was informative, and I left feeling confident that I could recreate the experience at home.
The chef, Sigolet, was charming, charismatic, and a great teacher. The class ran in two halves, perhaps mimicking the rhythm of a boulangerie. Steps overlapped other steps, and there were multiple processes happening all at once. To accommodate the three-hour time slot of the class, we made a couple of steps of croissant making. We began with the second half first before we proceeded to the first half.
The second half consisted of taking our prepared croissant dough—or to be accurate, the dough that had been prepared for us before the class—and learning to roll, then cut, and then form croissants, pain au chocolat, Swiss bread, which are twists commonly seen in boulangeries here. There are also a few other viennoiseries that we made.
The first half completed, our trays of newly formed treats were sent off to proof for the next hour or so while we focused on the first half of the croissant-making process. In our case, this dough would be used for the next class.
Overview: the amount and weight of the ingredients will have to be referenced. The requisite ingredient list with measurements: Step one, prepare the butter. We begin with a block of butter. Take a regular paper-sized piece of parchment paper and fold it in half. This is your template. Place your butter in the center and fold the parchment paper around it to form an envelope. Gently smash and roll out the butter into a thin uniform sheet that extends and fills the entire rectangle. It goes back in the refrigerator to chill and harden.
Step two, prepare the dough. We begin with a mixture of cake flour, a small amount of sugar, and a small amount of salt. Mix it together in a bowl and dump it out on a countertop. Create a well in the middle and pour in the water. Next, add the yeast. If you are using fresh yeast, crumble it directly into the water. If using dry yeast, add it earlier into the flour mixture to help activate it. Begin combining the ingredients with your fingers until it forms a sticky, shaggy clump.
Next comes the kneading process. Knead the dough for three to five minutes. Combine the dough into a ball, slightly stretch it, pick it up, and whip it onto the hard table surface, which will cause it to elongate even more. Stretch the dough back towards you, fold it in half, recombine it into a ball, and repeat. As you do, note the changing consistency of the dough from shaggy and sticky to shiny, uniform, and supple.
Begin rolling the dough out into a square. This is probably one of the most error-prone parts of croissant making, as precise geometric angles are important. There are tricks to correct many of the ways the dough can be misformed, but the more orthogonal your dough remains, the better the finished product will be.
Starting with your round dough ball, make two deep cuts at a right angle from each other through the center of the top of your ball. Pull back the four corners from the center towards the outside and slightly flatten your dough with your hands. You’ll end up with a rough square. Gently roll out your dough using a rolling pin until its vertical height is the height of an A4 piece of paper, and the horizontal width is slightly wider.
Take the butter out of the fridge. Unwrap it and place it in the center of the dough. Firmly press the butter down onto the dough. Fold the top section of your dough over the butter, then repeat with the bottom section, ensuring the dough is well sealed so there is no possibility for butter to escape.
Working on a lightly floured surface, roll the dough out, top to bottom, so that the dough length is roughly the length of the rolling pin. With this done, you can start the second fold. For the second fold, take the top and bottom, fold them together in the middle, and add one more fold at this edge.
In plastic wrap, we put it back into the refrigerator overnight.
Preparing the croissants. After your dough has had some time to rest and chill, probably preferably overnight, take your dough square out. Working on a nicely floured surface, roll your dough out flat to become the size of an A3 piece of paper. Trim all four edges so they are precisely square. Using a measuring device of some sort, measure the maximum width of your croissants.
Mark across the top of your dough. Carefully cut your dough into upside-down triangles. With the triangle pointed upwards away from you, begin rolling from the bottom to the top.
To make the croissant shape, there is one extra step. Make a cut in the middle of the bottom edge, up around 3 or 4 centimeters. This is called the Eiffel Tower cut. Starting with the two inner corners, roll the croissant to the top. Fold each end, called the ear, to the other side of the triangle.
To make the other viennoiseries, involve different shapes of cuts and folds. Fold the bottom part over one more time across the top. The bottom edge is the completion of the fold, which will keep the croissant folded together.
Once you have the croissants formed, the best way to proof them is to use a spray bottle and coat them with a fine mist of water. This will keep them from drying out. Place them in a nice warm environment. In a professional bakery, there would be a proofing room or something to control the humidity. But without this, we use a spray bottle. It works fine.
As the croissants proof, they will grow in size. There is one final step before baking. Crack one egg and whip it well. Using a pastry brush, apply an egg wash to the top of your croissants. Place them in a hot oven, at least 200, maybe even 220 degrees Celsius. After a few minutes, reduce the temperature slightly and let them finish around 160 degrees until they are a lovely golden brown color. Take them out and let them sit for a little bit. And voila! You have made croissants.
John Sullivan
Postdoctoral researcher
Postdoctoral researcher exploring research through design in the areas of music, movement, dance, and human-computer interaction.